Shaping User Experience With Teams Policies
- Kyle Anderson

- Sep 6, 2020
- 4 min read
Updated: Sep 7, 2020
As Teams becomes an ever increasing part of the work experience, having the ability to shape that experience becomes more important. We can shape this user experience by creating and administering policies in the Teams admin centre. In this post we'll be looking at the app "Setup policies" and the app "Permissions policies".
Remember that when working with Teams policies, changes can take up to 24 hours to take effect.
You will need to be a Teams admin to implement the changes discussed in this post.
Managing Apps in the Teams Admin Centre
At the time of writing my dev tenant has over 700 apps available - later we'll look at some PowerShell you can use to get this info from your tenant.
Within the Teams admin centre, navigate to "Teams apps" and select "Manage Apps", from this menu you will be able to manage what apps are available to be added to policies and how they become available.
If you would like to block any apps outright, you can do so by selecting the app you would like to block and selecting "Block".

You can also block all third-party apps across the entire organisation and block any new apps coming into the Teams app store

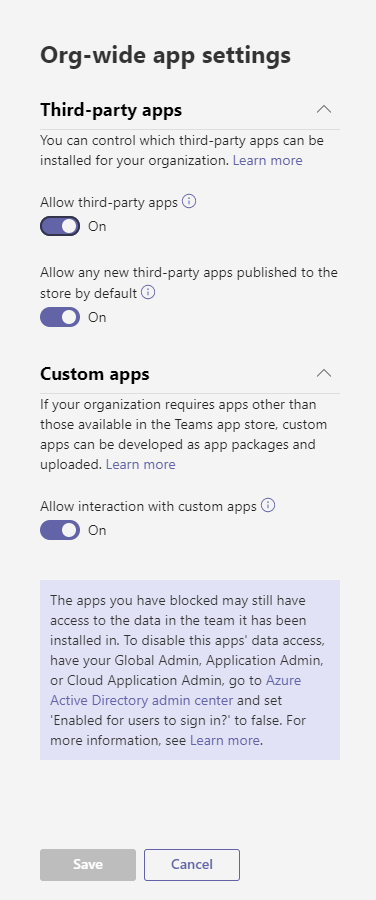
App Permissions Policy
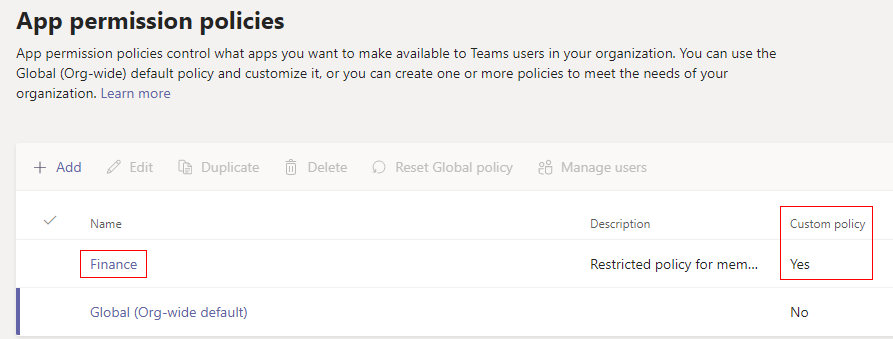
By default, all apps that haven't been blocked will be available in the global policy. If you want to edit this, or setup a new policy, you can do so within the Teams admin centre.
Navigate to "Teams apps" and select "Permission policies", from here you will be able to either edit the existing Global policy, or setup new policies.
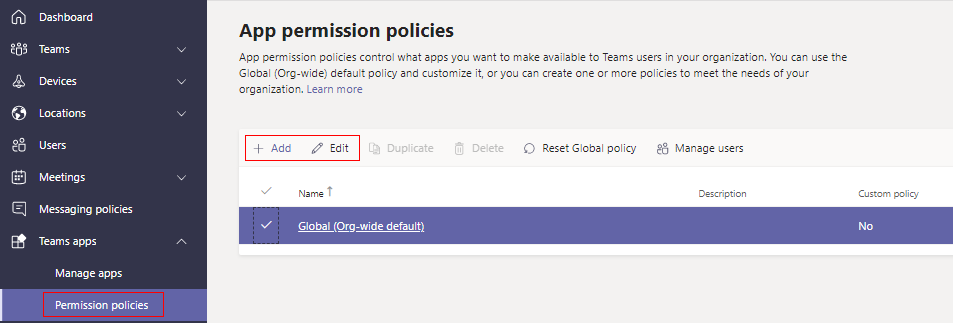
In order to add a new policy, click "+ Add", give your policy a name and description and then customise the settings to fit your requirements.
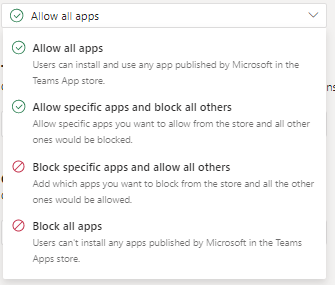
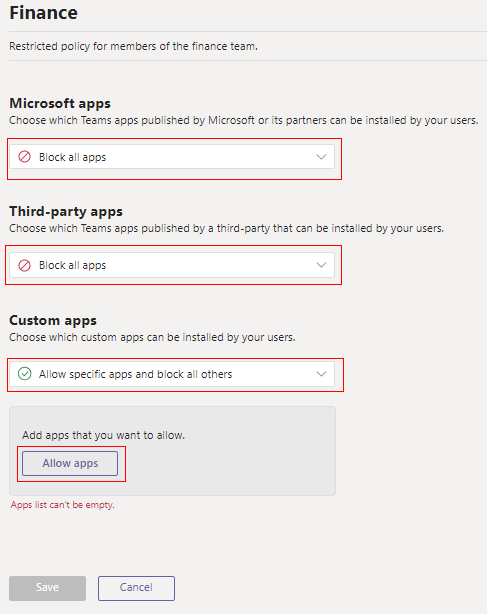
You can allow or block apps in 4 different configurations across 3 groups of apps
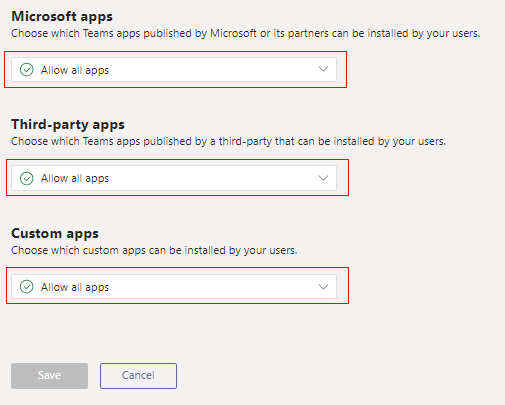
For this post we'll setup a new policy called "Finance". We're going to make this a very restricted policy with only the mandatory apps and a single custom app that I developed myself and have uploaded to the Teams store.
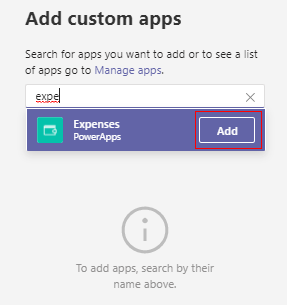
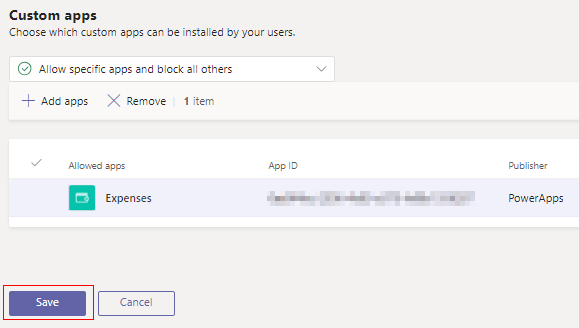
We will then search for the apps you would like to include in the policy, add them to the policy and click save to create the policy. We can come back later and edit the policy if need be.
App Setup Policy
In Teams, if your Setup policy has been left as default, you will notice that your left-hand menu looks as below (if you are on an education licence, you will also see "Assignments")


Within the Teams admin centre, navigate to "Teams apps" and select "Setup policies"
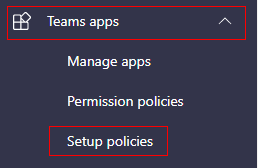
From here you will be able to either edit the existing Global policy, or setup new policies.
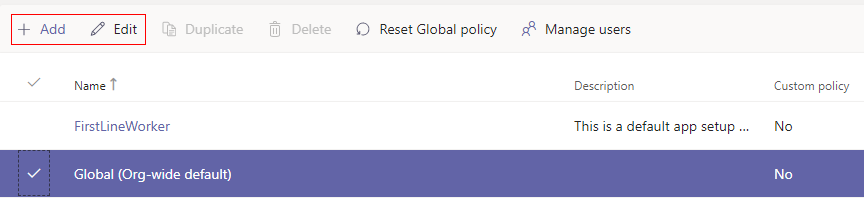
In order to add a new policy, click "+ Add", give your policy a name and description and then customise the settings to fit your requirements.
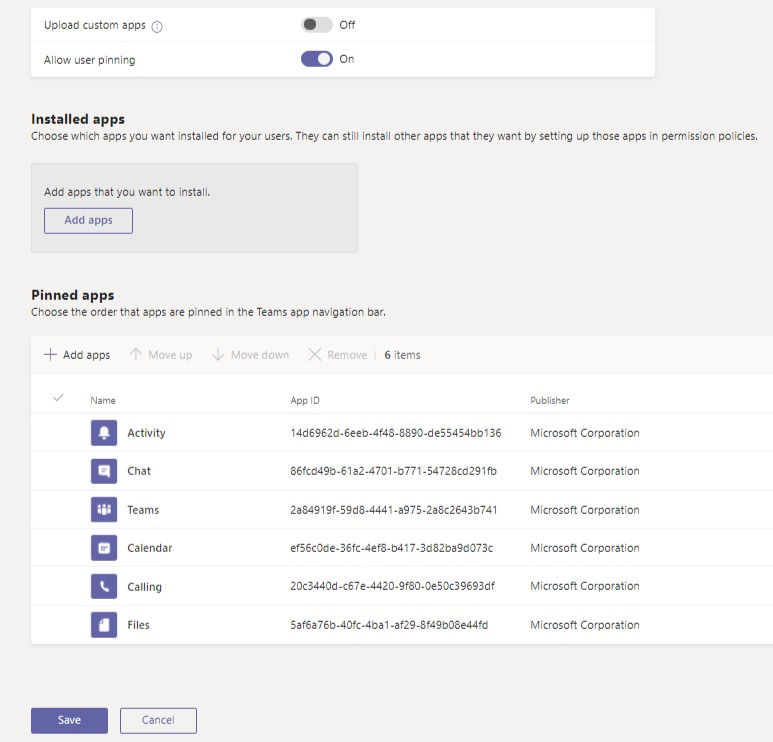
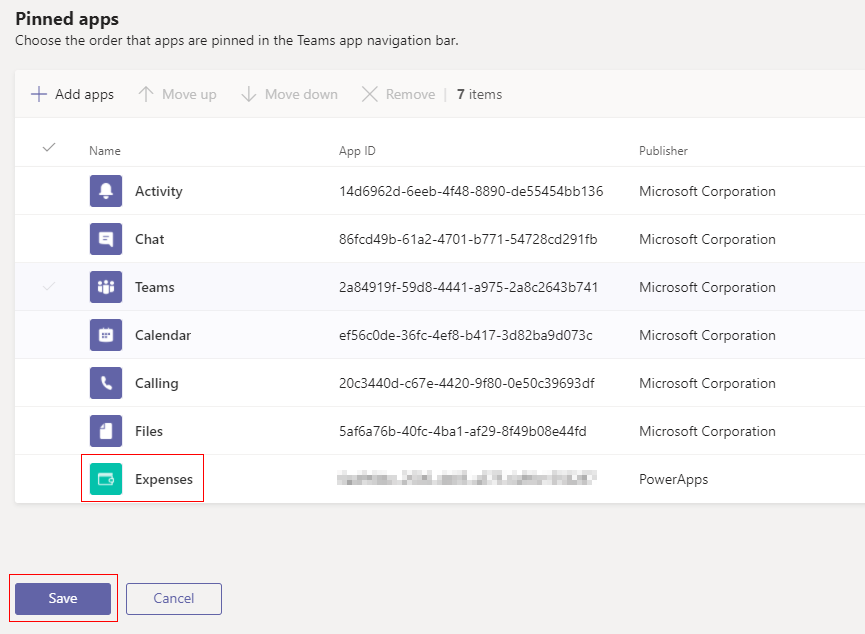
Once again, we are going to create a policy for our finance team. We'll also turn off "Allow user pinning", this prevents the user being able to pin any apps in the left-hand side menu. We'll click on "+ Add apps", select the Finance policy for the search field, and search for our expenses app. We'll add our app to the policy and click save.

Assigning the Policies
Now our policies have been setup, we can assign them to the relevant people. Either you can assign a user to the policy directly - select the policy and click "Manage users". You won't be able to see who is on the policy already, but you will be able to add users to it.


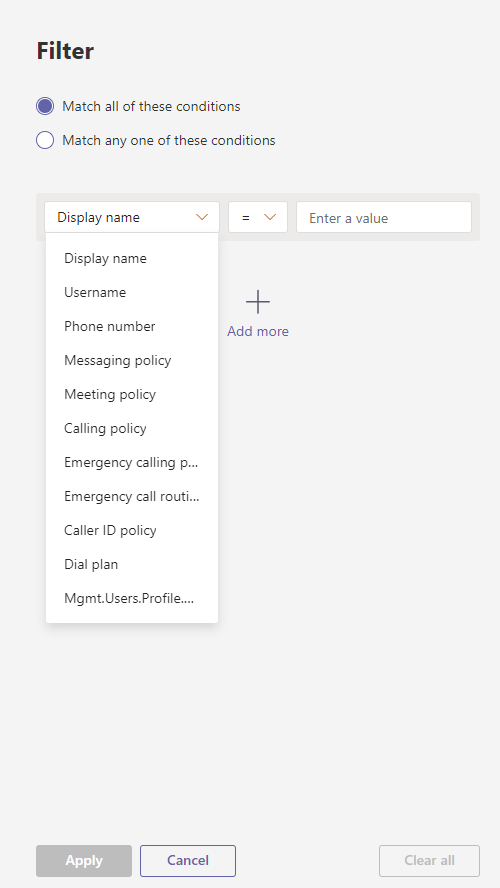
We can also assign the policy to all of our users (400 at a time) or a filtered selection of users. Navigate to "Users", select the users you would like to assign policies to, click "Edit settings", and assign the policies you would like.


And lastly, we can assign the policy directly to the user by selecting that user and navigating to the "Policies" tab and clicking "Edit", assigning the policy and clicking "Apply".

Now that we have assigned our new policies, we can see that we have very few apps available to us and our expenses app has been pinned on the left-hand side for easy access.

IMPORTANT: a user on a more restrictive policy will not be able to engage with an app that has been added to a Team if the app is blocked on their policy.
PowerShell Solutions for Teams Policies
Get all Teams Apps
This script will get all the Teams apps available. You will only see the apps available on the policy assigned to the user running the script. If you use a non-licenced account to run this it will retrieve the apps on the Global policy.
#Adjust as required
<#$login = ""
$pword = ""
$pword = ConvertTo-SecureString $pword -AsPlainText -Force
$credentials = New-Object -TypeName System.Management.Automation.PSCredential -argumentlist $login,$pword#>

Connect-MicrosoftTeams #-Credential $credentials

#Path where CSV will be saved
$CSVPath = "C:\Users\Desktop\TeamsApps.csv"

$Apps = Get-TeamsApp
$AppData = @()

foreach ($App in $Apps)
{
    $DataCollection = New-Object PSObject -Property ([Ordered] @{
        DisplayName =$App.DisplayName
        AppID       =$App.ID
        DistMethod  =$App.DistributionMethod
    })
    $AppData += $DataCollection
}

$AppData | Export-Csv -Force -NoTypeInformation -Path $CSVPath
Write-host -f Green "CSV created and exported"
Get All Assigned Policies in Teams
This script will retrieve all of your users and the policies they have been assigned.
#Adjust as required
<#$login = ""
$pword = ""
$pword = ConvertTo-SecureString $pword -AsPlainText -Force
$credentials = New-Object -TypeName System.Management.Automation.PSCredential -argumentlist $login, $pword#>

Import-Module SkypeOnlineConnector
$Session = New-CsOnlineSession #-Credential $credentials
Import-PSSession $Session

#Path where CSV will be saved
$CSVPath = "C:\Users\Desktop\UserPolicy.csv"

Write-Host -MessageData "Getting all enabled users"
$Users = Get-CsOnlineUser -Filter {Enabled -eq $True} | Select-Object
    DisplayName, `
    UserPrincipalName, `
    SipAddress, `
    TeamsMeetingPolicy, `
    TeamsMessagingPolicy, `
    TeamsMeetingBroadcastPolicy, `
    TeamsAppPermissionPolicy, `
    TeamsAppSetupPolicy, `
    TeamsCallParkPolicy, `
    TeamsCallingPolicy, `
    CallerIdPolicy, `
    TeamsChannelsPolicy, `
    TeamsEmergencyCallingPolicy, `
    TeamsEmergencyCallRoutingPolicy, `
    TenantDialPlan, `
    TeamsUpgradePolicy

$Users | Export-Csv -Path:$CSVPath -NoTypeInformation

Write-host -f Green "CSV created and exported"
Remove-PSSession -Session:$Session
More Info on Teams and PowerShell Solutions
More PowerShell solutions associated with Teams policies can be found in these two posts linked below:
Get all Teams apps in use
In Conclusion
Policies are a very easy and powerful way of shaping the Teams experience of your users. Whether it is a student who has been given a very limited Teams experience, or an IT developer/administrator who is given an extended or free-range experience, Teams policies can allow you to shape that as required.


Comments